The welcome message can be sent to:
- All employees by bulk email.
- A selected group of employees.
- A single employee.
The welcome message can be sent:
- When creating a new employee profile.
- When importing employees from a file.
- From the Employees tab – at any time and any number of times.
Editing the wording of the welcome message
The welcome message can be edited in Settings > Settings > General > Notifications. In the list of default templates for email notifications, there is the template named Basic: Welcome message.
To edit a message, click its name.

You can edit:
- Message subject,
- Message content.
In both fields, you can insert shortcodes. They let you personalise the message.
If you want to learn more about how to create automatic messages and use shortcodes, click here.
If an employee is to find the welcome message useful, it must include at least:
- Link to the login form,
- Employee login,
- Workspace name,
- Link to a page allowing them to set their password.
The default email signature will be added to the message (to edit the signature, go to Settings > Settings > General > Notifications).
REMEMBER to save the message.
You can preview the message by clicking the View for employee button.
REMEMBER! The system will send the message only to the employees who meet all of the following criteria:
- They have a valid email address,
- Their activity status is “active”,
- Their employment status is “employed”.
Sending messages at any time
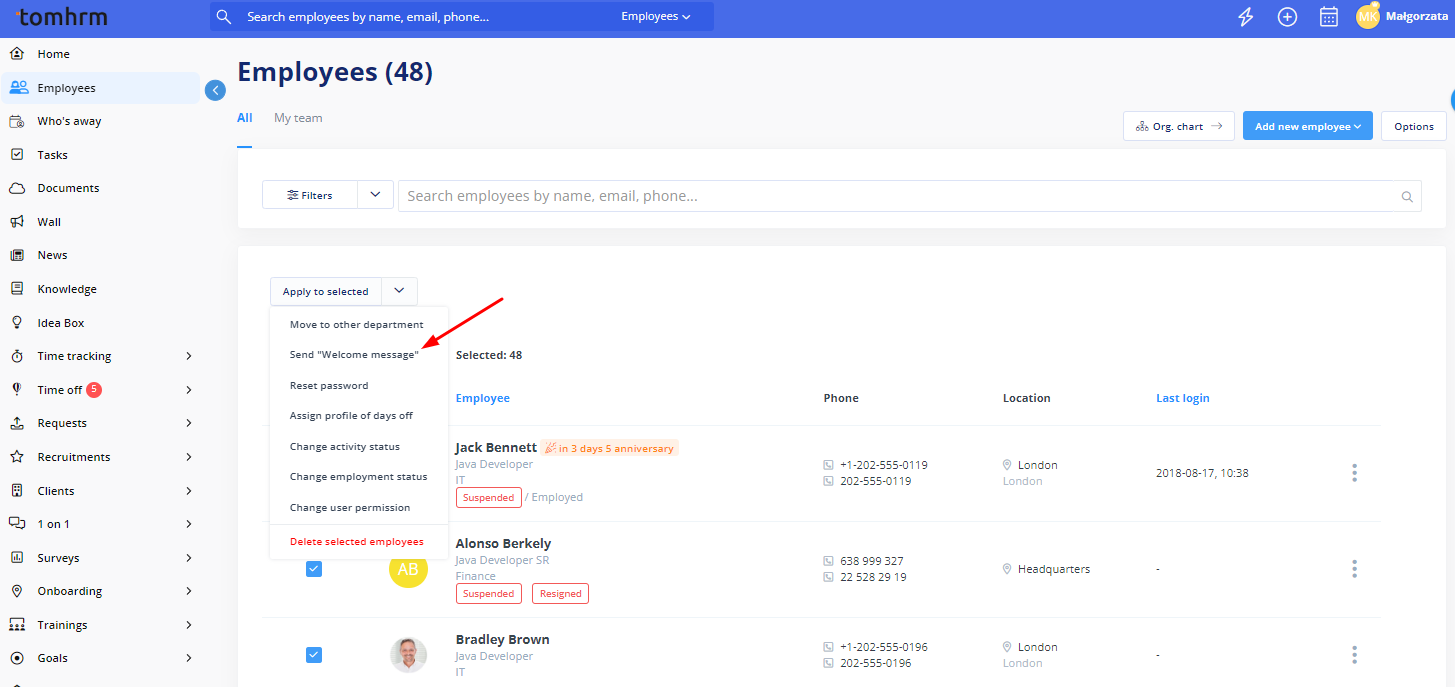
To send the welcome message to selected employees, go to the Employees tab and select the employees you would like to send the message to by ticking the appropriate checkboxes.
You can do it manually (selecting the employees one by one) or in bulk by selecting the “Select all” or “Select on this page” option from the drop-down list.
After you select the employees that are to receive the welcome message, scroll to the bottom of the Employees screen and select the Send “Welcome message” option from the Apply to selected list – the system will then send the message to them.

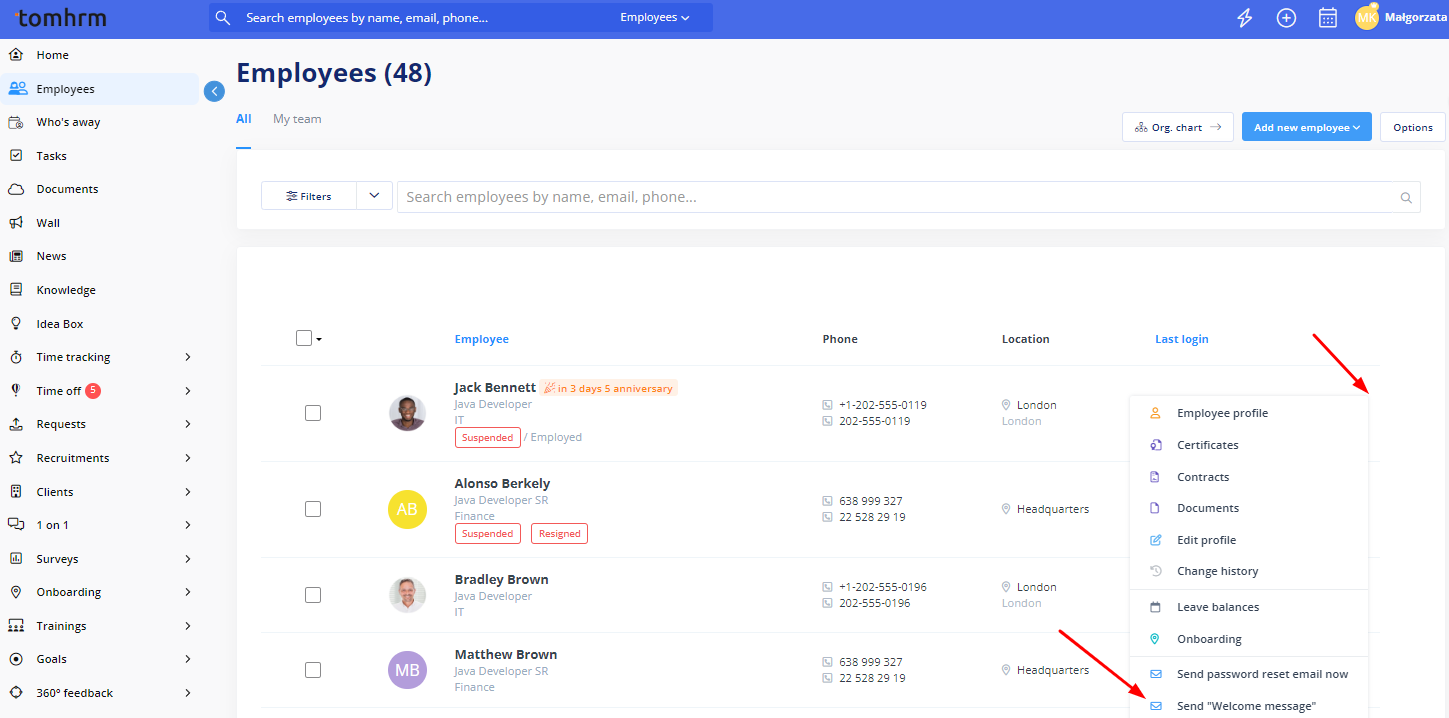
To send a message to a single employee in two ways:
- Select an employee from the list as above and click the Send “Welcome message” to move to the message edit screen.
- Use the three-dots menu next to their name (in the employee list).

When you click the Send “Welcome message” button, you will be moved to the screen allowing you to prepare the message for sending, where you can edit the wording of the welcome message and email signature and confirm the list of the selected employees.
Creating and testing the welcome message
On the welcome message sending screen, you can:
- Select the employees to which the message will be sent (you can select employees one by one or all of the employees in a given department by clicking the name of the department).
- Create or modify the wording of the welcome message (the default wording is taken from a template. If there are no templates for the welcome message, you will have to compose the message from scratch).
- Create or modify the wording of the email signature (the default wording is the default email signature, taken from the email signature template).
- Send a test message to the specified email address.
