Whether you’re building new employee profiles or updating existing profiles, the employee import feature has several benefits that make maintaining your employee’s information easy.
Before you start
Prepare your CSV file with the following in mind:
- You must have either an email address or a user ID for each contact you import. Otherwise, the contact will not land in the database.
- Mind the data format; the default is UTF-8.
- Include column headings.
Import rules
- You can choose import mode: import new employees or update existing employee profiles,
- Based on the data from the file, the following are also automatically created: locations, departments, job positions, manager-subordinate relationship,
- If there is an error in the file (e.g. incomplete data in a mandatory column) the system will show the report with the list of errors and no data will be imported. In this case, you need to look into the report, correct the data and start the import all over again.
- You decide which group of permission is assigned to new employees,
- You decide which Onboarding workflow is assigned to new employees,
- You can automatically send “Welcome message” to new employees .
STEP 1 Preparation of the import file
Employee import template
Download the template below and open it on your computer. To download click here
Using it or a copy of it, prepare the data of the employees to be imported. To do this, fill in the appropriate fields in the form’s columns.
Data descriptions (* is required data)
- *Login,
- ID – any string of characters and numbers, helpful in integration with SSO or other system for matching employees records,
- Type ID – enter the name in the cell: ID [options is no longer supported],
- *Firstname,
- *Lastname,
- Sex – gender; choose from: male, female, bi_gender, female_to_male, non_binary, male_to_female, trans_female or trans_male,
- Job position – the name of Job position, will automatically create such a record and assigning an employee to this position,
- Department – Name of Department, will automatically create such a record and assigning an employee to this department,
- Parent Department – Name of parent department; One of the earlier ones may be listed, or a new department name may be given. Will be assigned as the override to the given department name,
- *Location – Name of the location; Location has a timezone, country, manager of Location. Some data is used in e.g. Time Off, Time tracking module,
- *Timezone (Location) – choose from the list available here,
- *Country (Location),
- *Clock-in/out ID condition (Location) – Select the Clock-in/out rule assigned to the location.
- D – default rule,
- or specific name (ID) of the rule assigned to the location.
If you don’t have the Time Tracking and Schedules module enabled, enter the letter D.
- *Free days ID profile (Location) – enter the name of the days off profile assigned to the location.
- N – the system will create a new profile automatically (based on country),
- D – branch profile,
- or specific name (ID) of an existing profile.
- *Billing period (Location) – enter the type of the work settlement period assigned to the employee’s location.
- M – monthly,
- Q – quarterly.
- Organization – name of the company,
- Manager – e-mail address of other employee acting as direct manager. This person will be assigned as the supervisor,
- *E-mail – a unique e-mail address must be entered, will not import a record with a duplicate e-mail address,
- Mobile phone – employee’s mobile phone number; you should enter the number without spaces, in the international format with the country code prefix (e.g., +48xxxxxxxxx). This allows the employee to use the password reset feature via SMS.
- Phone 1 – landline number,
- Phone 2 – second landline number,
- Type of employment,
- Employment day – date format is only DD-MM-YYYY,
- Birthday – date of birthday; date format is only DD-MM-YYYY; a different date format will prevent this data from being imported (the employee record will be imported). The date in the app is only displayed as DD-MM. It is possible to disable the display of this information in the entire system, for all users,
- *Language interface – en_EN or pl_PL.
- Responsibility – the content of the ‘Responsibilities’ field visible in the employee’s profile.
-
*Clock-in/out ID condition (Employee) – Select the Clock-in/out rule. This setting determines the available methods and rules for time tracking. You can enter:
- D – default rule,
- L – according to assigned location,
- or specific name (ID) of a rule available in the system.
If you don’t have the Time Tracking and Schedules module enabled, enter the letter D. You can read more about rules here: https://support.tomhrm.com/kb/reguly-clock-inout
- *Free days ID condition (Employee) – enter the name of the days off profile assigned to the employee. This field allows you to link the employee with the appropriate free days calendar.
- D – default rule,
- L – according to assigned location,
- or specific name (ID) of a profile available in the system.
- *Schedule ID condition (Employee) – enter the name of the schedule rule assigned to the employee.
- D – default rule,
- or specific name (ID) of the schedule rule.
If you don’t have the Time Tracking and Schedules module enabled, enter the letter D.
- *Billing period – enter the type of the work settlement period assigned to the employee.
- M – monthly,
- Q – quarterly,
- L – according to location.
Supported import file formats:
- CSV
- XLS
- XLSX
Remember: Do not change column names or their order!
After filling in the fields, check that all required fields (login, first name, last name, branch, its time zone and country, employee’s email address, and interface language) are completed, and then save the file to your disk.
STEP 2
Go to the Employees list and click the Add Emplyee > Import new file button.

This will direct you to the bulk employee import process.
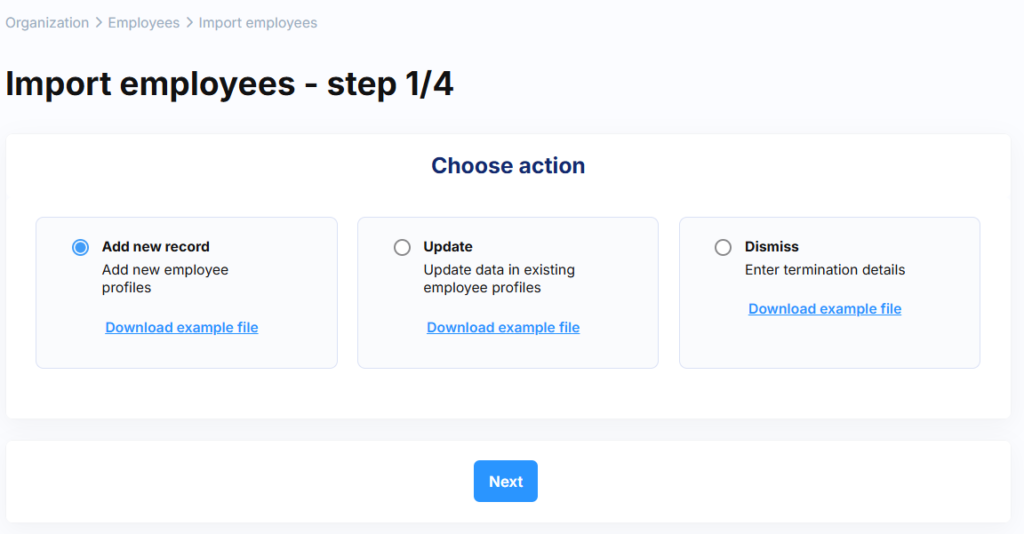
STEP 3
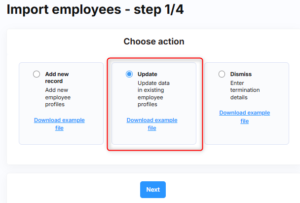
Choose whether the import should add new employees or update existing ones, then click Next.
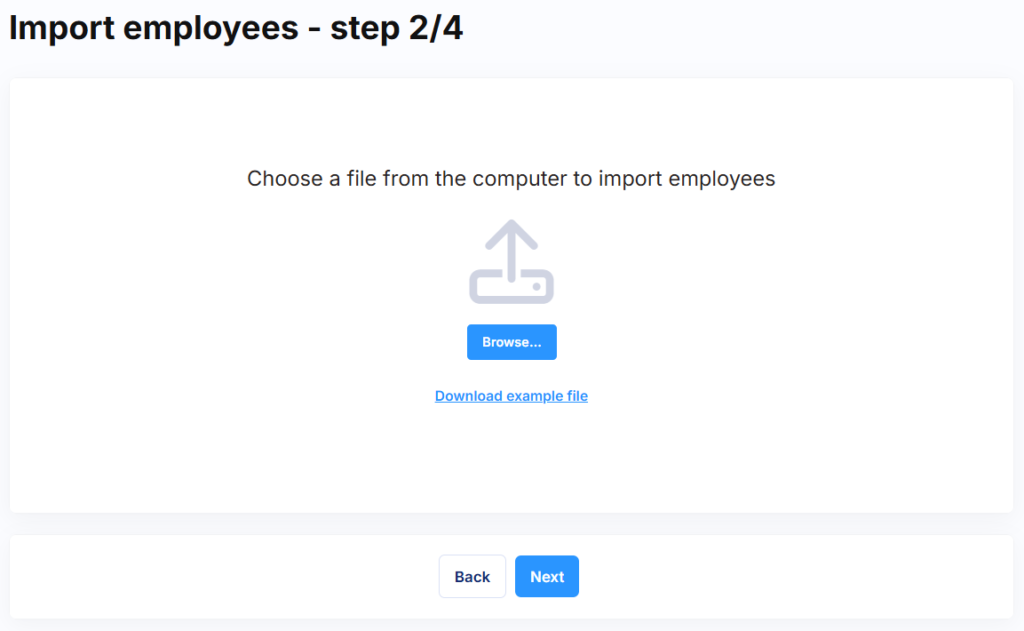
STEP 4
Choose the file you prepared for import from your drive and proceed by clicking Next.
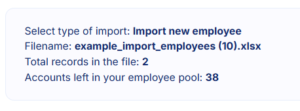
STEP 5
The system will present a summary indicating the available number of user licenses as well as the number of employees detected in the file.
If you have selected to update employee data, you must choose the employee identification method. The available options are:
-
email address
-
identifier (ID)
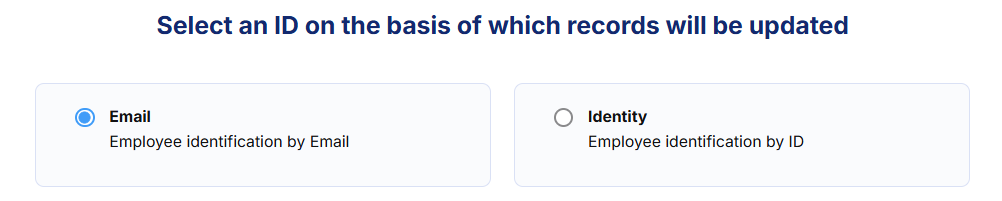
If you select the identifier, ensure that the ID field is completed for all employees in the file, since it is not a required field. Without it, the system will not recognize the records to update.
At this stage, you need to:
-
map the data – check whether the column names (read from the file) have been matched to the appropriate fields in the profiles. If not, assign the correct column name from the file to the descriptive field name.
If in step 3 you selected to import new employees, you must also:
-
assign permissions – choose one permission group for all imported employees. This step is mandatory. The permission group can later be changed individually for selected employees.
-
decide whether to enroll employees in the onboarding process (optional) – this option is available if you have purchased the Onboarding module. For employees to be enrolled in the onboarding process, the onboarding path must have been previously created and published in the system.
-
decide whether to send a welcome message (optional).
These options are not visible if you are only updating employee data. You can always change permissions or send welcome messages to existing employees in bulk via the Employees module.
After filling in the data, click the ‘Import Employees‘ button.
STEP 6
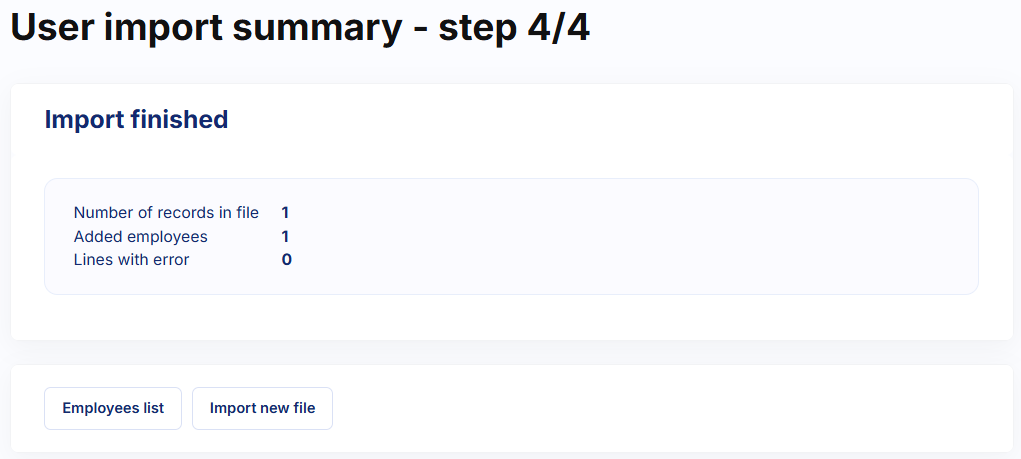
Done, the system has completed the employee import!
If all the data is correct, the system has entered the complete information and will display a message showing how many records were imported.
At this point, you can also go to the Employee List or Import a new file.
Note!
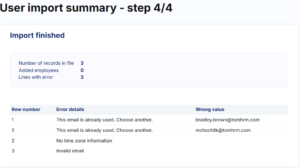
If any errors are found in the file, the system will not import any data and will display a report indicating what needs to be corrected.
In this case:
-
Check all the indicated rows in your file.
-
Enter the correct data and save the file on your computer.
-
Use the “Import a new file” option at the bottom of the summary. Clicking the button will take you back to step 3 of these instructions.
How to update data in employee profiles?
If you want to perform a bulk update in employee profiles using Excel import, you must follow the identical procedure as when adding new profiles, with the difference that in step 3 of the import instructions above (Import method selection step), you select update data in existing profiles.
REMEMBER! Updating and creating new profiles are always separate import processes.
If you want to simultaneously create several new profiles and update existing ones, you must perform the procedure twice – once to update profiles and then to add new ones.
In such a situation, we recommend first updating existing data, and then supplementing the same Excel file with new employee data and importing the file.
If you want to:
- update a single employee’s data
- manually edit the profile regarding data that cannot be imported
Here you will find instructions for adding or updating a single profile.