
In order to create a days off profile:
Step 1
Go to Settings > Settings > Employees > Days off and click on the Create free days profile button.
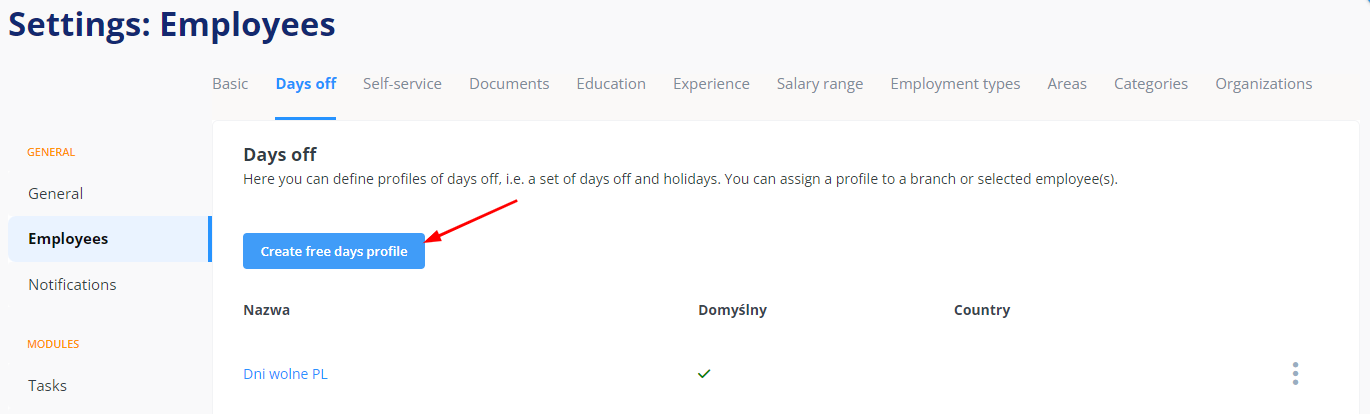
A window will pop up where you can specify the profile name and mark it as default (if you wish).
Save the changes.
Step 2
Go to the screen for defining days off:
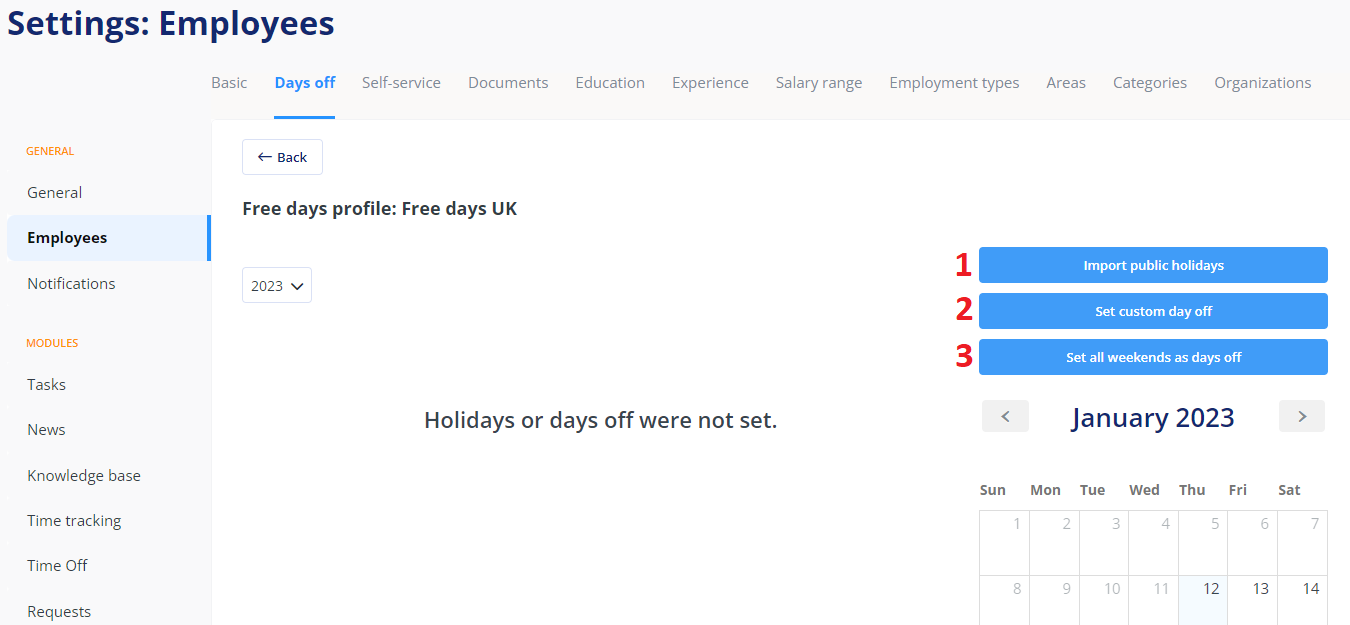
- Import public holidays – a window will pop up where the system will let you select the country and year and will show the appropriate set of holidays taken from the Google database. Ticking the checkboxes, you can select all or only a few days for import:

- Set custom day off – Please select the day off type (Weekend, Holiday, Custom day off) and indicate whether it should be:
- a single day off (specific date → e.g., a company-wide day off in exchange for a holiday that fell on Saturday)

- a number of days of the week (specific day/days of the week that will always be days off). You can specify an end date for the rule. This setting will allow you to add multiple days off to the Days off profile in bulk.
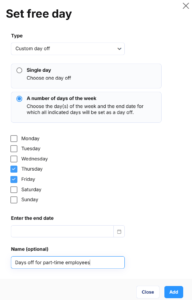
Add an optional name for this day, which will be visible in the calendar.
- a single day off (specific date → e.g., a company-wide day off in exchange for a holiday that fell on Saturday)
- Set all weekends as days off – select the year and set all Saturdays and Sundays as days off in bulk.
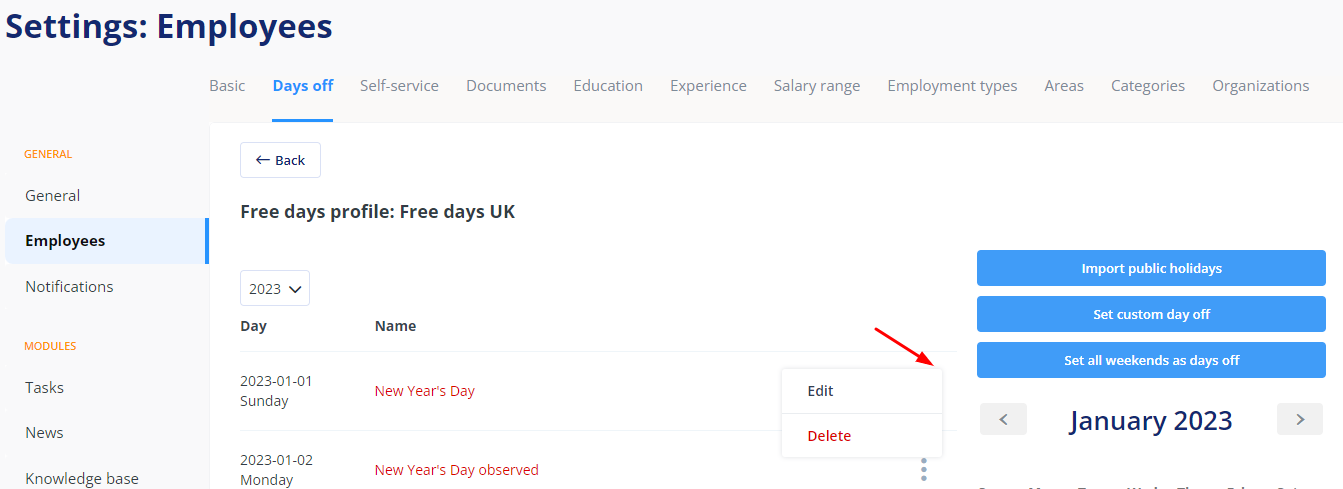
After you add all desired days off, the list will appear in the profile. Here you can manage them by clicking on the three-dots menu next to a given date.
The dropdown menu has two options – Edit and Delete:
At any given time, you can:
- assign such a profile to an employee, or
- assign it to a location.
To learn how to do it, go here.
Remember!
- You can edit free days profile later.
- When you change the set of days off in a profile, the system will update these data in the calendars of all employees using that profile.
- You can only remove a profile that is not marked as default and has not been assigned to any employees or locations.