Projects are used for time tracking and workforce management within your organisation.
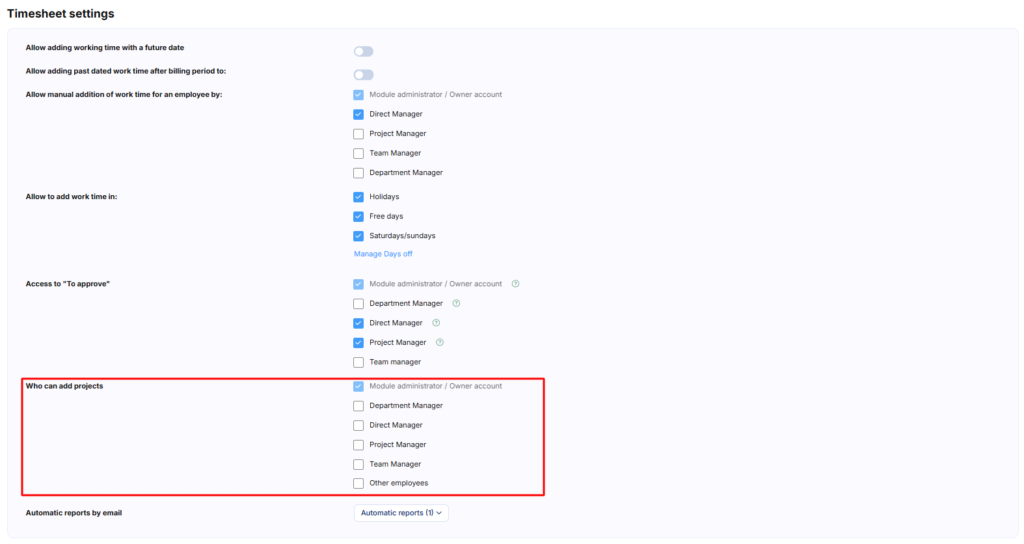
Who can add projects?
By default, the following users have permission to create projects:
- Module Administrator
- Account Owner
To grant project creation permissions to additional users:
- Navigate to Settings > Parameters > Time Tracking
- Locate the Timesheet settings section
- Select the users you wish to authorise for project creation
How to add a project
To create a new project:
- Go to Time Tracking > Projects
- Click the Add Project button on the right-hand side of the screen
General project information
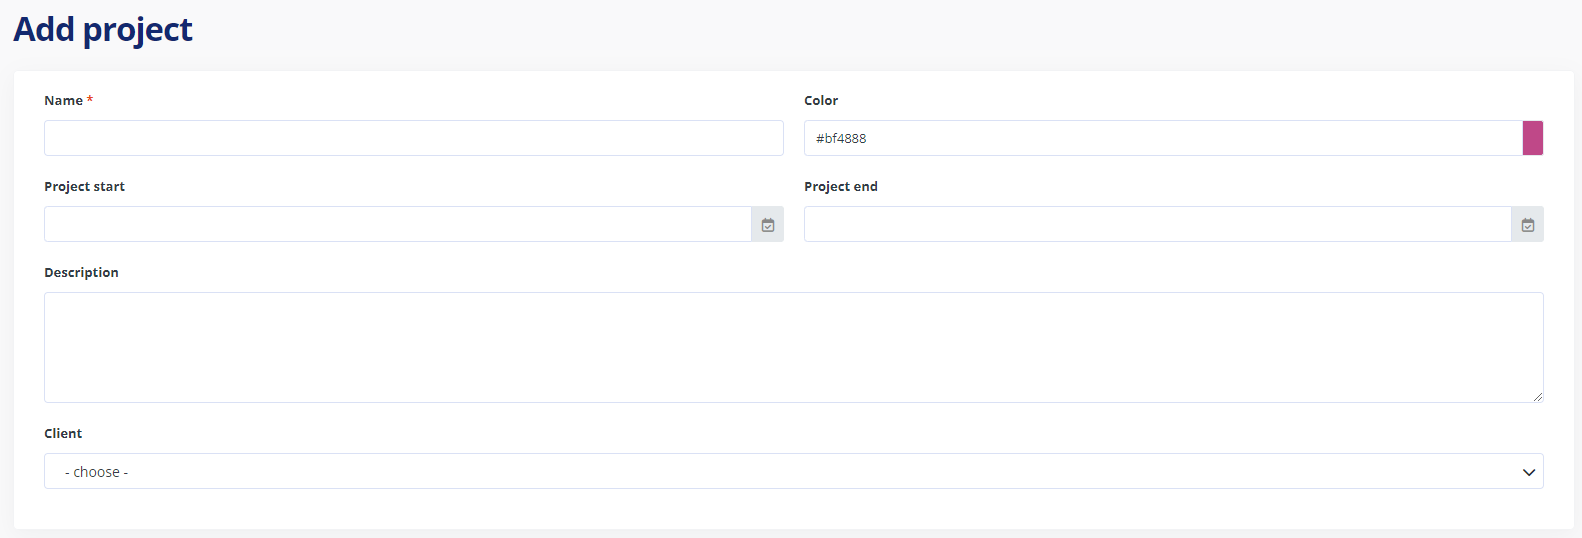
In the first section, configure the basic project details:
- Project name
- Colour coding for visual identification
- Start and end dates
- Project description
- Client assignment (you can build your client database in the Clients section of the left menu)
Project billing methods and budget
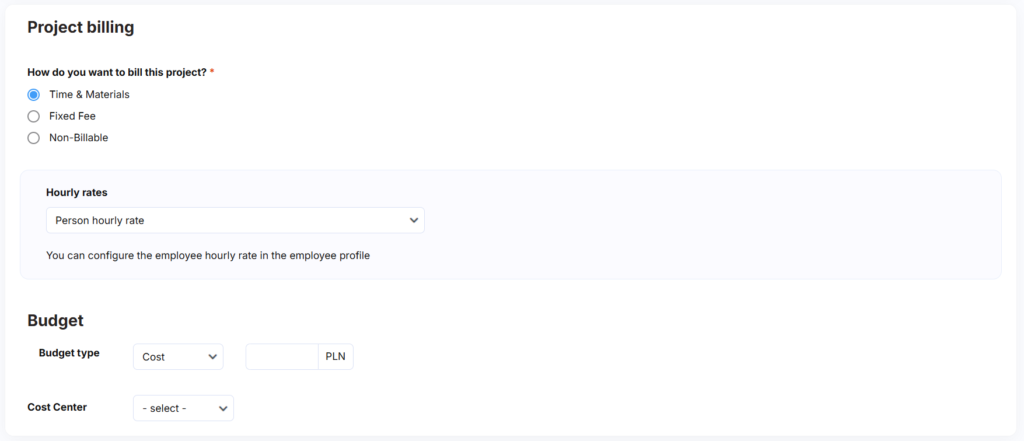
Configure your project’s billing settings and budget allocation. When setting a budget, you can assign the project to a specific cost centre for enhanced financial tracking.
To create cost centres:
Go to Settings > Parameters > General > Cost Centres
Cost centres can also be assigned to departments for organisational alignment. For detailed setup instructions, please refer to our comprehensive guide.
Billable rates and internal cost visibility settings
Configure who can view external and internal cost breakdowns within the project. This setting determines which team members have access to financial data and cost analysis for the project.
Email notifications
Choose whether the system should send automatic email reminders for time entry completion. For more information about this feature, consult our dedicated notification guide.
Team members (project participants)
Assign team members using either manual or automatic methods:
Manual team assignment
To manually add team members:
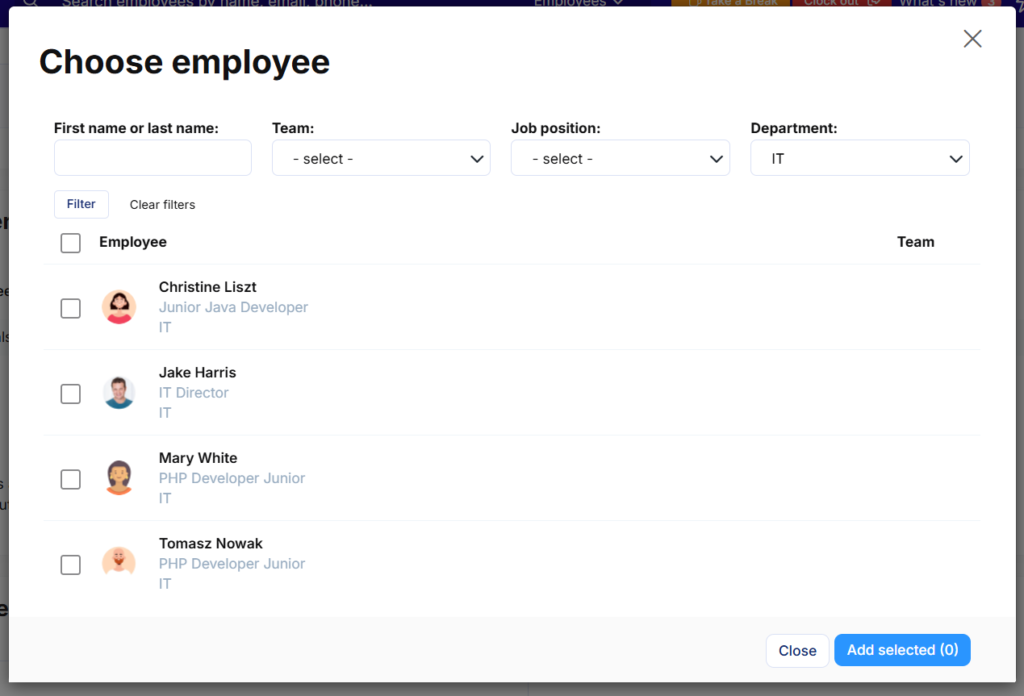
- Click Choose employee
- Select specific individuals by ticking the checkbox next to their details
- Use filters by Team, Position, or Department to streamline selection
- Confirm your selections
You can edit team membership at any time by adding or removing participants.
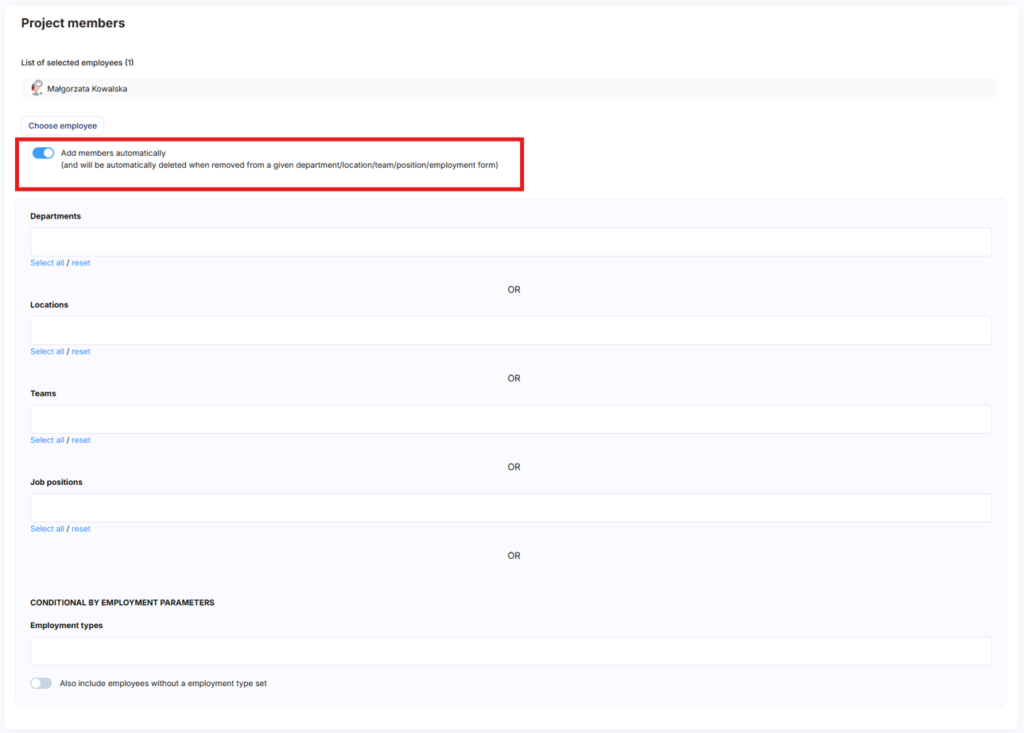
Automatic and dynamic team assignment
Automatic assignment continuously adds team members who meet specified criteria throughout the project’s duration.
You can automatically include employees from:
- Specific departments
- Locations
- Teams
- Particular job positions
- Employment types
Example: If you select employees from a specific branch office, any new hires joining that office whilst the project is active will be automatically added to the project team.
Automatic team update rules
- Closed or paused projects: No new members are added automatically
- Reopened projects: Automatic additions resume
- Duplicate prevention: Each employee is added only once
- Manual removal required: Employees who no longer meet criteria must be removed manually
Additional team configuration
Complete your team setup by:
- Assigning project rates to team members (if required)
- Designating a project manager
- Setting the project status
- Clicking Add Project to finalise
Pro tip: If you’ve selected Time & Material billing with hourly employee rates and automatic team additions, you’ll need to manually set rates for each new team member. Consider using per-project rates or default employee rates for dynamic team assignments.
Adding project tasks
Once your project is created, you can begin adding tasks to organise and track work effectively.
Task creation permissions
Task creation permissions are configured during project setup. By default, the following users can add tasks:
- Time Tracking Module Administrator
- Project Manager
- Project Author
Optional permissions: You can also grant task creation access to project members. When enabled, team members can create tasks for themselves and other project participants.
This flexible permission structure ensures proper project governance whilst enabling collaborative task management when appropriate for your workflow.
You can add tasks by specifying:
- Task name
- Start and end dates
- Task description
- Cost centre assignment
- Task status
Task assignment options:
- Unassigned tasks: Visible to all project team members
- Individual assignment: Only the assigned team member can view and log time against the task

