Synchronizing employees through integration with Google Cloud Identity / Google Workspace enables the automatic transfer of employee data from Google Cloud to the tomHRM application.
Rules for synchronizing employees with Google Cloud Identity / Google Workspace:
- Synchronization is automatic and does not require additional actions from employees.
- It occurs once a day during nighttime hours.
- It is one-way. Data from Google Cloud is copied or updated to tomHRM, but synchronization does not occur in the opposite direction. This means that after a successful synchronization, editing an employee’s name in the tomHRM application will not update the employee’s name in the Google Cloud service.
- If an employee in Google Cloud does not have a filled-in first name, last name, or email address, synchronization will fail (this information is essential in the tomHRM system).
The following employee data is mapped and synchronized
- First and last name
- Location (In Google, the equivalent of the Location field is treated as ‘Organizational Units’)
- Department
- Position
- Direct manager
- Country
- Phone
Configuration of employee synchronization with Google Cloud Identity / Google Workspace
To perform synchronization, the first step is to configure an application with the necessary permissions in the Google API Console, which will provide information to tomHRM. The company must also have an active and verified account within Google Workspace.
The synchronization configuration is conducted in two stages:
- On the Google Cloud side
- In the tomHRM application
Google Workspace Configuration
Step 1
Go to http://console.developers.google.com/ and click on New Project, then enter the name of the new application/project.

Step 2
Navigate to the details view of the newly created project and then to the Library tab. Search for Admin SDK in API Library, go into details, and click the Enable button.

Step 3
Go to the Credentials tab in the left menu.
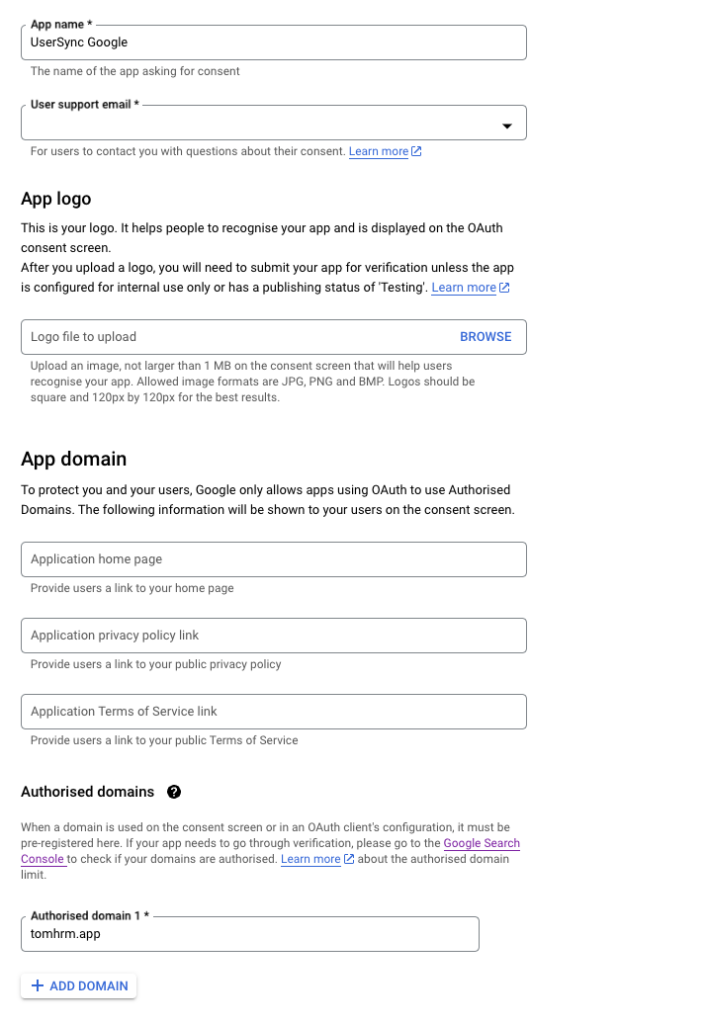
Click Configure Consent Screen.

Choose External as the User Type option.
Enter:
- Application name
- Support email for employees using the application.
In the Authorized domains section, add the domain tomhrm.app.

Step 4
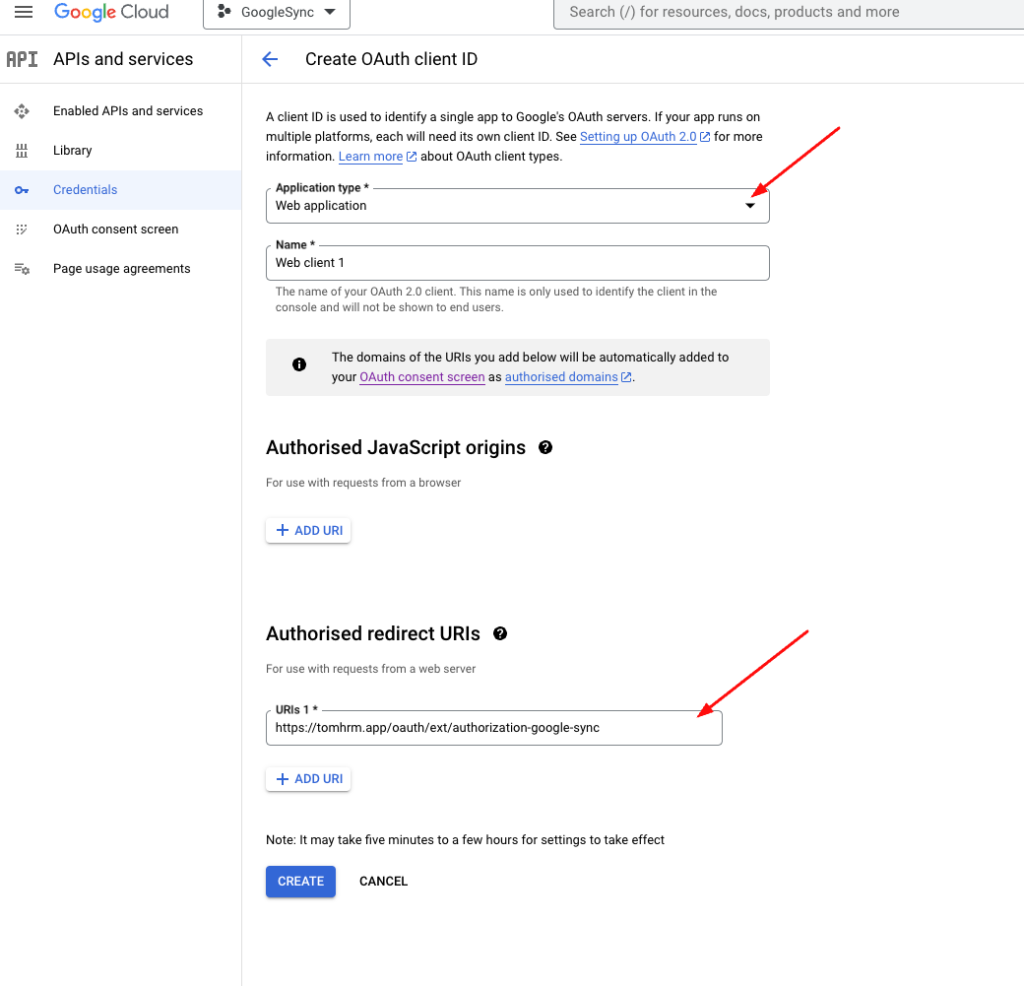
Go back to the left menu Credentials and click Create Credentials this time. Then, from the available options, choose OAuth Client ID, and as the Application type, select Web application.
Step 5
Fill in the permission name (internal name, not visible to employees), and in the Authorized redirect URIs field, add the following URL to the list of authorized URLs: https://tomhrm.app/oauth/ext/authorization-google-sync

A summary screen will appear with the created parameters Client ID and Client secret. Copy and save both of these parameters in a separate file. They are necessary for configuration in the following steps.

Configuration of Synchronization within the tomHRM Application
Access to the configuration is available only to the account owner and the person indicated by them in the configuration (details below).
Step 1
Starting the configuration go to the Settings > Parameters > Employees > Sync. Employees tab and choose Google Cloud Identity as the service for synchronization.
In this step, you can optionally specify an employee who will have access to the configuration and synchronization history (in addition to the account owner).
Step 2 – Choosing the Default Department
Select the default department when an employee does not have this field filled in within Google (organizational unit). If you don’t choose the default department, employees without a set department in the Google application will be skipped during synchronization.
Step 3 – Application Configuration
In the application configuration section, paste the two values copied earlier from the Google Console:
- Application Client Secret
- Application Client ID
Step 4 – Choosing the Default Permission Group
Select the default permission group that will be set when adding a new employee. The permission group is not updated in subsequent synchronizations (after the first addition of an employee).
Click the Continue button.
If everything went well, there will be a redirection to the Google service, where you must approve access to the application for tomHRM.
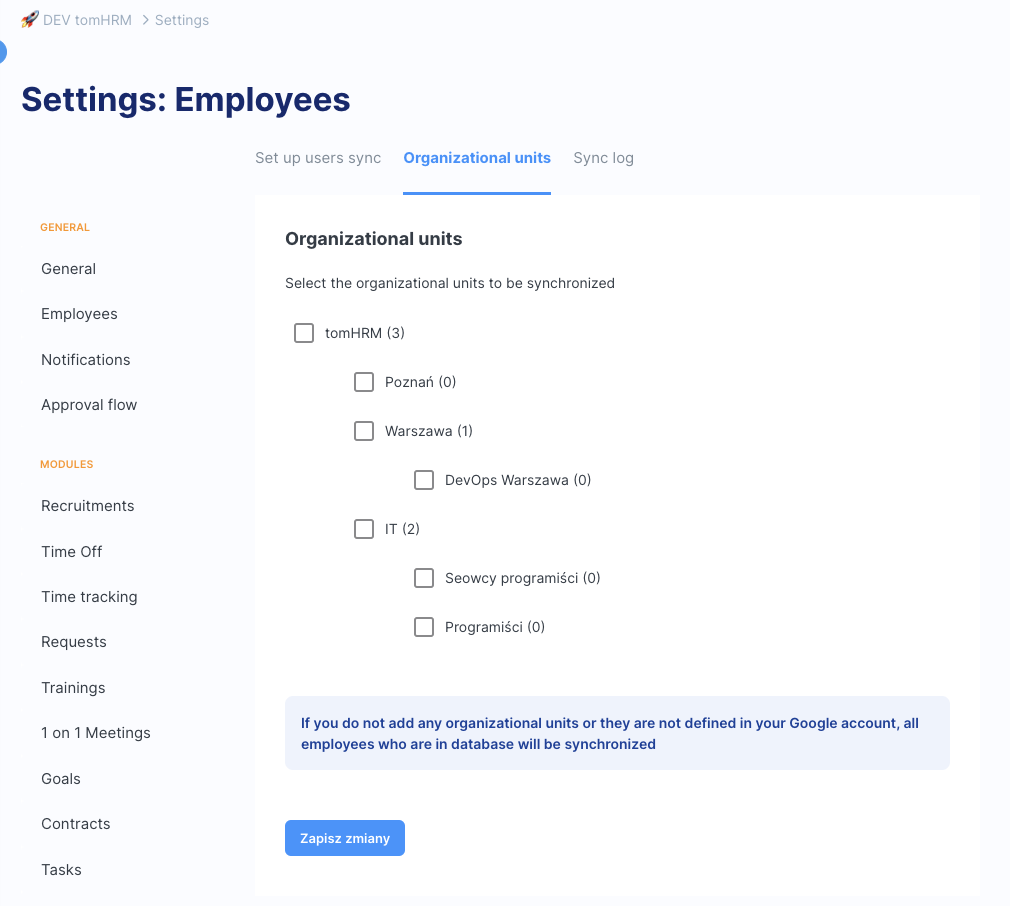
Step 5 – Choosing Employee Units for Synchronization
If access approval went well, a redirection will appear to the step where you choose which employee units should be subject to synchronization (according to employee groups in Google Workspace). If you don’t choose any group, synchronization will apply to all employees.

Step 6 – Checking the Correctness of Synchronization
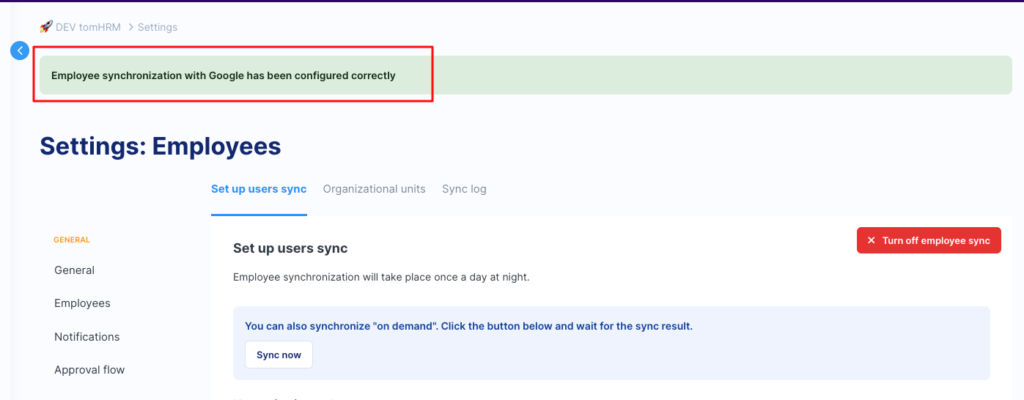
Save the changes. If everything went well, the system will display a message about successful configuration.
You can disable synchronization at any time using the Turn off employee sync button.

Information about synchronizations is recorded in a separate Sync Log tab:

