Step 1 – Register and configurations your OpenIdConnect (OIDC)
- Go to administration page https://<subdomain>.onelogin.com/apps
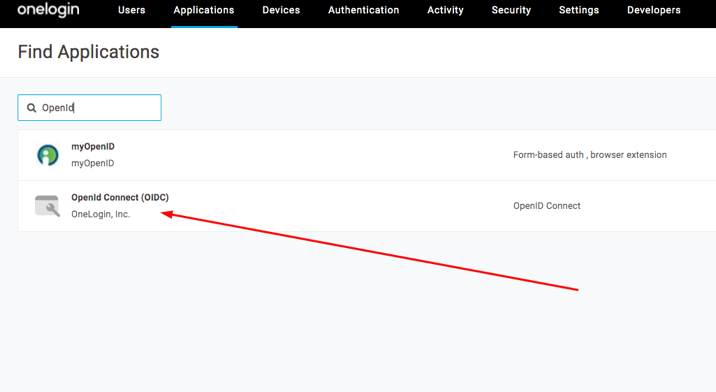
- Click “Add App” and search “OpenID Connect” application
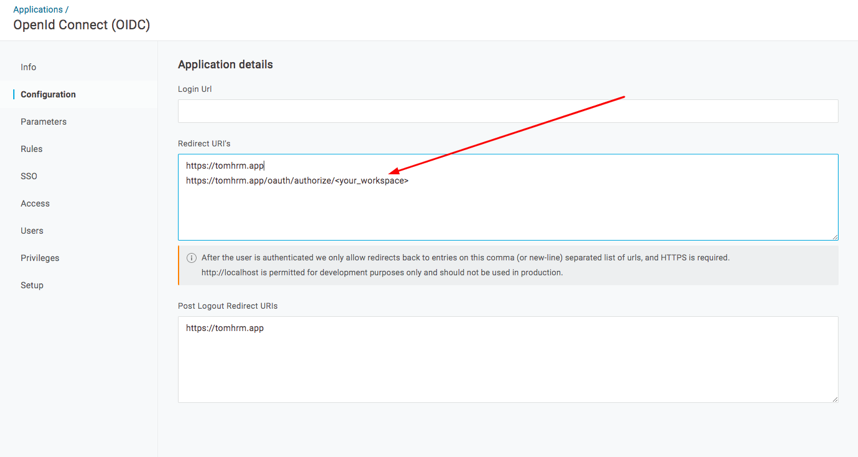
- Fill “Redirect URIs” as https://tomhrm.app and https://tomhrm.app/oauth/authorize/<your_workspace> where <your_workspace> is your workspace of tomHRM
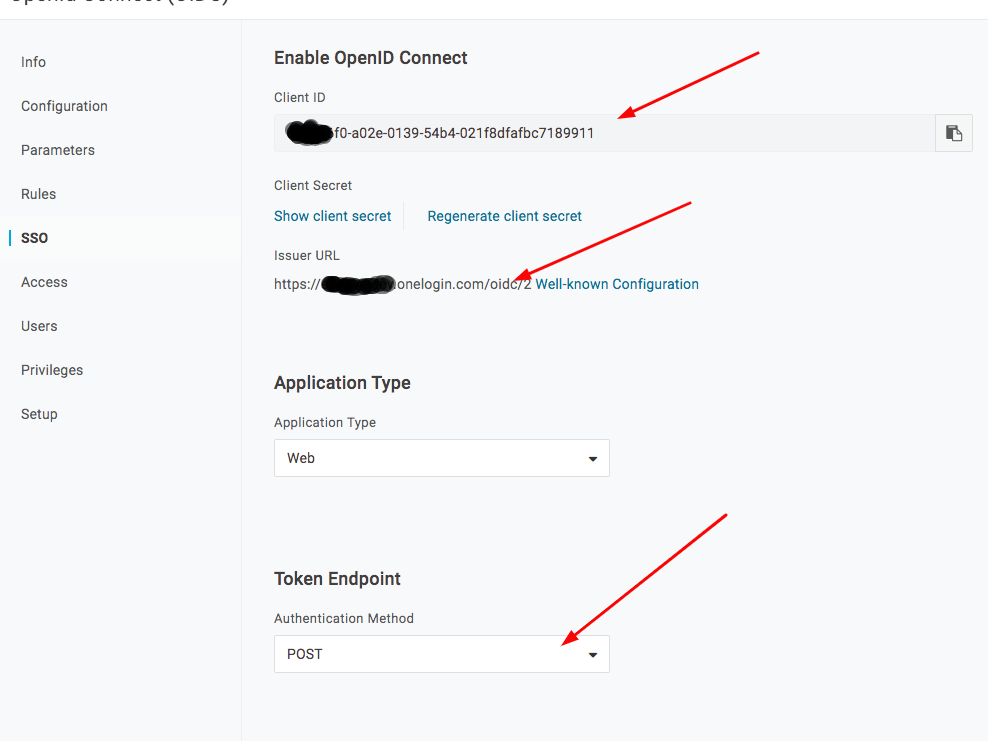
- Select option “POST”
- copy to clipboard 2 value (marked in the screenshot) – Client ID and Client Secret
Configuration instructions can also be found on the website https://developers.onelogin.com/openid-connect/connect-to-onelogin
Step 2 – Configuration tomHRM
- Go to Settings > Settings > Authentications and turn on „Single Sign-On”.
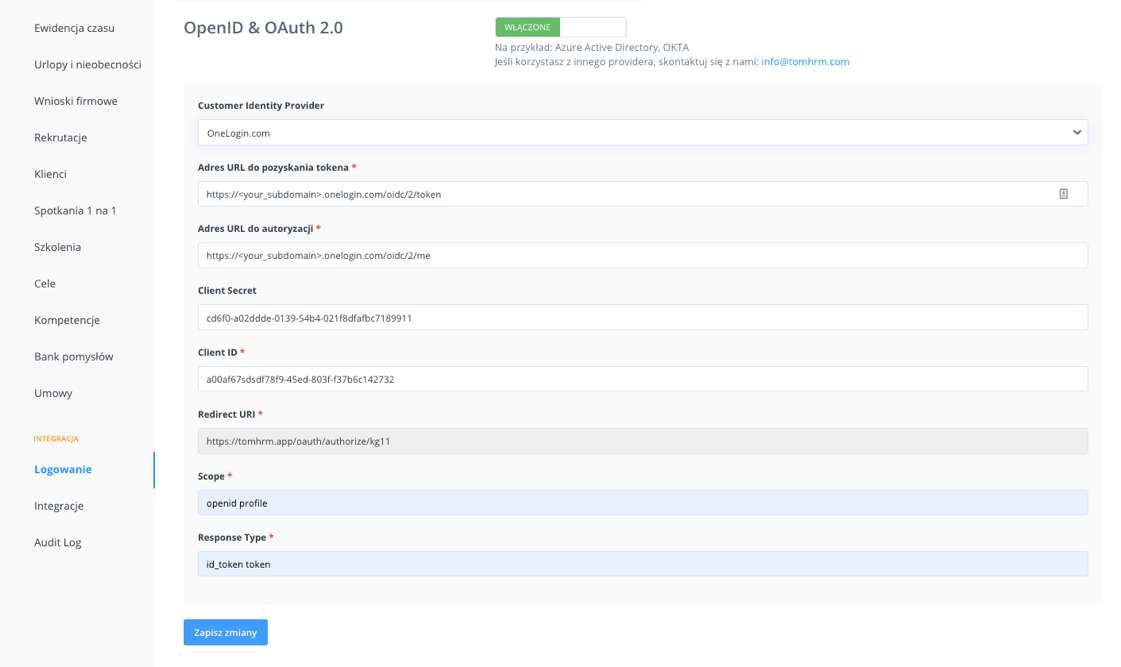
- Fill in based on the screenshot:
- Customer Identity Provider – select „OneLogin”
- URL token: https://<your_subdomain>.onelogin.com/oidc/2/token where <your_workspace> is your workspace in tomHRM
- Auth URL: https://<your_subdomain>.onelogin.com/oidc/2/me
- Client Secret and Client ID fill with values as before (Step 1, point 5).
- Scope set as: openid profile
- Response Type set as: id_token token
tomHRM authorizes users from OneLogin based on a unique employee ID or email.
If the employees listed in OneLogin have the same e-mails defined in the tomHRM, the setup is complete.
Otherwise, associate employee accounts by providing identifiers.
Step 3
- On the Onelogin account go to tab Users
- Each user on the list is assigned a unique identifier:
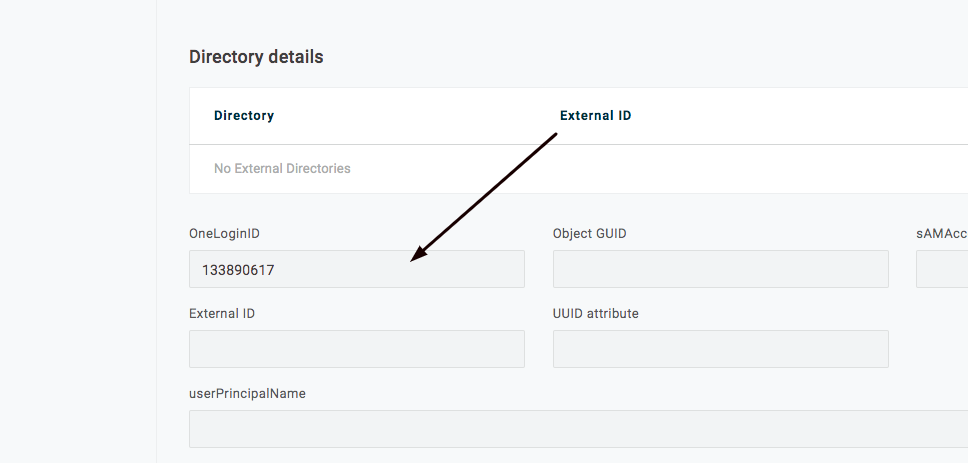
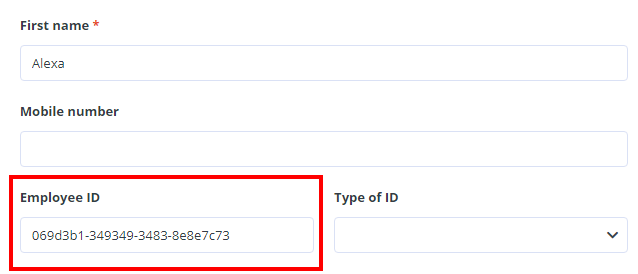
- The employee ID marked in the screenshot must be entered in the “Identifier” field in the employee profile in tomHRM
You can fill it manually or using employee import from file.
